

Pre-infusion is a low-pressure soak, usually 1 to 3 bar, that saturates the coffee puck before your machine ramps up to full 9-bar extraction pressure. For home espresso, the practical move is simple: use it if your machine offers it, start with a 4 to 8 second setting, and taste before you tweak further. Done right, it cuts down on channeling and gives you a rounder, more consistent shot.
TL;DR:
- Pre-infusion duration should be adjusted based on roast level, with dark roasts requiring 4 to 5 seconds, medium roasts 6 seconds, and light roasts 8 to 10 seconds.
- Consistent pressure and full machine warm-up are crucial, as pressure surges or cold equipment can undermine pre-infusion effectiveness.
- Total shot time, including pre-infusion, should typically be 25 to 32 seconds, starting the timer from pump activation for accurate dial-in.
- Pre-infusion benefits are most noticeable with light roasts, dense beans, or inconsistent puck prep, while it adds little for evenly tamped dark roasts.
- Proper puck distribution, grind size, and dose control remain more important than pre-infusion settings for achieving a balanced espresso shot.
Table of Contents
- What Is Espresso Pre-Infusion and Why Does It Change Extraction?
- How Long Should Pre-Infusion Last for Different Roasts?
- How Does Pre-Infusion Work Differently Across Machine Types?
- How Do You Build Pre-Infusion Into a Repeatable Dial-In Routine?
- When Pre-Infusion Helps Most, and What Goes Wrong Without It
- What Espritkaffe Has Learned From Testing Pre-Infusion Across Roasts
- Why Grinder Quality and Puck Prep Beat Any Pre-Infusion Setting
- Sources
What Is Espresso Pre-Infusion and Why Does It Change Extraction?
Channeling is the enemy of a good shot. It happens when water finds the path of least resistance through your puck, usually a crack from uneven tamping or a soft spot from sloppy distribution, and blasts through it while the rest of the coffee barely gets touched. Slam a dry, unevenly packed puck with 9 bar of pressure right out of the gate, and you’re begging for channels to form. The water doesn’t care about your $20 bag of single-origin, it just wants the easiest way out.
Pre-infusion works by changing the order of operations. Instead of hitting the puck with full force immediately, the machine holds pressure around 1 to 3 bar for several seconds first. That gentler push does two things at once. It lets the puck swell as the grounds absorb water, which physically tightens up small gaps and weak spots before they can become channels. At the same time, it releases trapped carbon dioxide from freshly roasted beans, gas that would otherwise create uneven resistance and push water toward whatever path is easiest, exactly the channeling problem you’re trying to avoid.
The result is a puck that’s more uniformly saturated by the time full pressure arrives, so extraction pulls more evenly across the entire bed of coffee rather than concentrating in a few lucky (or unlucky) spots.
Here’s what’s actually happening during that soak phase:
- Water enters the puck at roughly 1 to 3 bar, a fraction of the 9 bar used for full extraction.
- Grounds absorb moisture and expand slightly, closing small voids in the puck.
- Trapped CO2 escapes gradually instead of creating pressure spikes later in the shot.
- The puck reaches a more even moisture level before the pump kicks into full gear.
Pro Tip: Watch the spouts during pre-infusion, not the clock. If you see a steady stream instead of slow beading, full extraction has already started and your “pre-infusion” isn’t doing its job.
Pressure consistency matters here as much as the number itself. A pump that surges or a boiler that’s still catching up on temperature will undermine even a well-timed pre-infusion, because the puck needs a steady, gentle push, not an erratic one. If your machine’s pressure gauge jumps around during the soak phase, that inconsistency shows up as uneven extraction later, no matter how carefully you set your PI duration.
How Long Should Pre-Infusion Last for Different Roasts?
There’s no single correct duration, but there are ranges that work as sensible starting points depending on your beans and your machine. Most machines with a fixed pre-infusion cycle run 4 to 8 seconds, and that’s a reasonable default if you’re not sure where to begin.
Break it down by roast and you get a clearer picture:
- Short (2 to 5 seconds): dark roasts, which are already more porous and soluble, need less soak time before extraction begins.
- Common (4 to 8 seconds): medium roasts and most everyday blends land comfortably in this range.
- Extended (6 to 12+ seconds): light roasts, which are denser and slower to release flavor, often benefit from a longer soak, and some home baristas push adjustable machines toward 15 to 20 seconds experimentally.
One detail trips up more people than anything else in this process: pre-infusion time counts as part of your total shot time. If you start your stopwatch at the first drop instead of at pump activation, you’ll consistently think your shots are running shorter than they actually are, and you’ll keep tightening your grind to “speed things up” when the real problem is a timing measurement error. Always count pre-infusion from the moment the pump engages, not from first drip, or your numbers will drift and your dial-in will chase a moving target.
For a standard double shot at 18 grams in, aim for a total shot time (including pre-infusion) of 25 to 32 seconds. A practical starting point looks like this: dark roast, 4 to 5 seconds PI, 25 to 27 seconds total. Medium roast, 6 seconds PI, 27 to 30 seconds total. Light roast, 8 to 10 seconds PI, 30 to 32 seconds total, adjusting grind finer if the shot runs fast despite the longer soak.
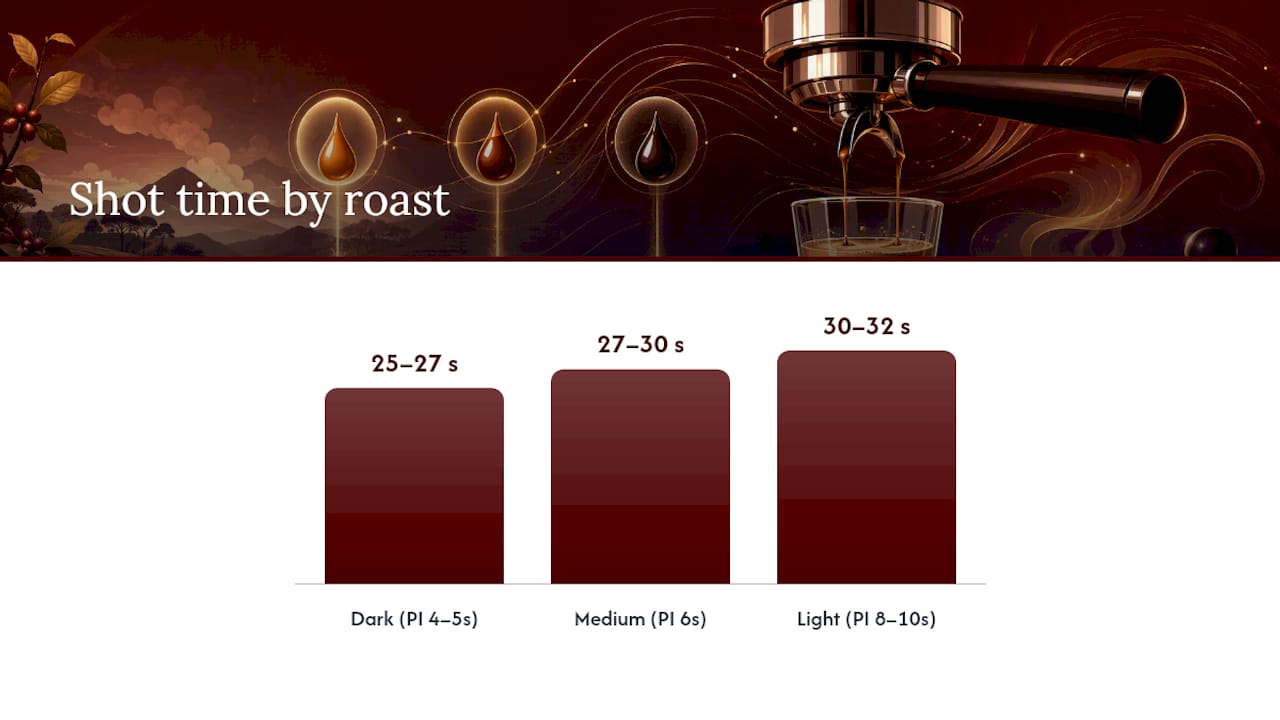
These aren’t fixed rules. They’re starting points you refine by tasting, one variable at a time.
How Does Pre-Infusion Work Differently Across Machine Types?
Not every machine handles pre-infusion the same way, and knowing which category yours falls into changes how much control you actually have over the process.
E61 and line-pressure groupheads. Classic E61 group heads use residual line pressure from the boiler, typically low, to wet the puck the moment you flip the lever, before the pump engages at full force. It’s a mechanical, built-in behavior rather than a programmable feature, which means consistency depends more on your machine’s plumbing than on any setting you dial in.
Pump-driven and software-controlled machines. Many modern home machines use a programmable low-duty-cycle pump phase, essentially pulsing the pump at reduced power for a set number of seconds before ramping to full pressure. This implementation style gives you a numeric setting, which is convenient, but many entry-level home machines cap adjustment range or lock the duration entirely.
Manual and lever machines. Spring-lever and manual machines let the barista control pre-infusion directly through partial lever lift or a deliberate start-stop pump technique, holding low pressure by hand before committing to full extraction. It takes more practice to reproduce shot after shot, and on machines without a built-in PI cycle, achieving this manually sometimes involves aftermarket valve modifications or gauge kits to monitor pressure accurately.
Here’s how the three compare at a glance:
- E61/line-pressure: automatic, consistent, but not user-adjustable.
- Pump/software: programmable and repeatable, though home units often limit the range.
- Manual/lever: fully controllable, but demands practiced, consistent timing.
How Do You Build Pre-Infusion Into a Repeatable Dial-In Routine?
Treating pre-infusion as one more variable in a controlled process, rather than a magic fix, is what actually separates a good home setup from a frustrating one. Here’s a workflow you can repeat shot after shot.
Before you pull a single shot:
- Let the machine fully warm up, boiler and group head both, since a cold group head will sabotage pre-infusion consistency regardless of your settings.
- Flush the group head briefly to normalize portafilter temperature.
- Weigh your dose on a gram scale (18 grams is a common double-shot starting point).
- Distribute the grounds using a WDT tool (Weiss Distribution Technique) to break up clumps before tamping.
- Tamp level and firm, then tare your cup or scale to zero.
Running the actual dial-in:
- Start with a baseline recipe: 18 grams in, targeting 36 grams out, total shot time 25 to 32 seconds.
- Set your pre-infusion duration based on roast (use the ranges from the timing section above as your starting point).
- Start your timer the instant the pump activates, not at first drip.
- Watch the spouts: you want slow beading and gradual, even darkening during PI, not a steady stream.
- Let the machine ramp to full pressure once the puck looks evenly saturated.
- Record your final yield weight and total shot time the moment you cut the shot.
- Taste, and log grind setting, dose, PI duration, and total time together so you can compare batches later.
Deciding what to adjust between test shots:
If the shot runs fast and tastes sour or thin, tighten your grind slightly before touching pre-infusion. If it runs slow and tastes bitter or harsh despite a reasonable grind, shorten your pre-infusion first rather than opening up the grind, since a shorter soak often fixes the timing without sacrificing extraction evenness. Change one variable per test, grind, dose, or PI duration, and keep a written log. Adjusting two things at once means you’ll never know which change actually caused the difference in your cup.
Pro Tip: A cheap kitchen scale won’t cut it for this kind of testing. A scale with a built-in timer removes the guesswork of syncing your phone’s stopwatch with your pour, which matters more than it sounds like it should.
When Pre-Infusion Helps Most, and What Goes Wrong Without It
Pre-infusion isn’t a universal upgrade. Its benefit scales directly with how fragile your puck is to channeling in the first place, meaning the payoff is biggest in specific situations and fairly marginal in others.
You’ll see the clearest improvement with light roasts, since their denser bean structure resists water penetration and benefits from that extra soak time. Very fine grind settings, which pack more tightly and channel more easily, also respond well to a gentle pre-infusion phase. The same goes for setups with inconsistent puck prep, if your distribution technique varies shot to shot, pre-infusion offers a bit of a buffer, though it’s a poor substitute for actually fixing your technique. Extreme doses, either very light or very heavy for your basket size, tend to channel more too, and a longer soak helps compensate.
Where it does little: dark roasts with a well-distributed, evenly tamped puck, and standard doses on a basket size the shot was designed for. In those cases, pre-infusion is a nice-to-have, not a fix for anything broken.
The most common mistakes all revolve around measurement and attention, not the technique itself:
- Forgetting to count pre-infusion time as part of the total shot, which quietly skews every timing decision you make afterward.
- Watching for beading but missing that a steady stream during PI means real extraction already started too early.
- Running pre-infusion too long on a light roast without rebalancing total shot time, which builds body but can tip into bitterness.
When a shot still tastes uneven despite a properly timed pre-infusion, the fix usually isn’t PI at all. Run through this order: check your distribution and WDT technique first, then adjust grind one small step, then shorten your pre-infusion slightly, and finally confirm your brew temperature is stable. Pre-infusion compensates for small inconsistencies. It won’t rescue a puck that was poorly prepped from the start.
What Espritkaffe Has Learned From Testing Pre-Infusion Across Roasts
Testing pre-infusion side by side across our light, medium, and dark roasts is how we landed on the roast-based starting points recommended earlier in this guide. Light roasts consistently wanted the longer end of the range to soften their denser cell structure; dark roasts extracted cleanly with a shorter soak and occasionally turned muddy if we pushed PI too long.
If you’re just getting into structured dialing, our dial-in walkthrough covers the baseline recipe and timing approach referenced throughout this piece. For roast-specific context on why light and dark beans behave so differently under pressure, our breakdown of espresso roast versus filter roast is worth a read before you start adjusting your own presets.
Why Grinder Quality and Puck Prep Beat Any Pre-Infusion Setting
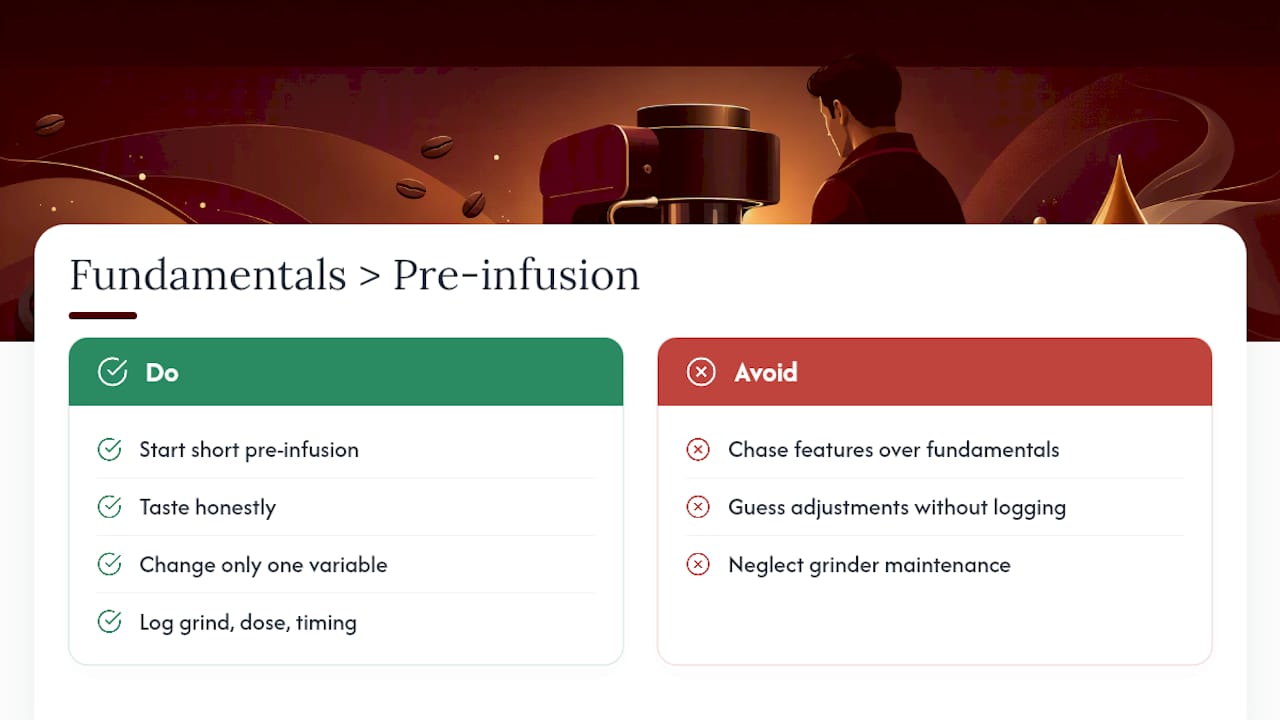
Pre-infusion gets treated like a feature to chase, something a machine either has or doesn’t, when really it’s a small correction layered on top of fundamentals that matter far more. A stale grinder burr or a lazy tamp will beat a perfectly tuned pre-infusion cycle every time. The home baristas getting the most out of PI aren’t the ones with the fanciest machines, they’re the ones logging grind, dose, and timing changes methodically instead of guessing.
Start with a short pre-infusion, taste honestly, and change one thing at a time. Our dial-in guide walks through that exact process if you want a structured place to begin, and pairing it with beans built for consistency, browse our coffee collection, makes the whole habit easier to stick with.
— Jett
Sources
For deeper technical grounding on the mechanics and timing covered here, these sources are worth bookmarking: a glossary breakdown of pre-infusion pressure ranges, a complete guide to pre-infusion durations, notes on why total shot time must include pre-infusion, and a visual-cue guide to timing pre-infusion by sight. For roast-specific brewing context, see our own notes on adjusting grind size.
- What is pre-infusion in espresso? — Coffee Equipment Reviews
- Espresso Pre-Infusion Explained: Why and How to Use It (2026) – Brewed Barista
- Espresso extraction time guide — PuckYeah