

The best approach to lighting a home coffee bar is layered: combine pendants or recessed fixtures for ambient light, under-cabinet LED strips or puck lights for task work, and wall sconces or portable lamps for accent and mood. Use CRI ≥ 90 sources tuned to 3000–3500K for prep surfaces and 2700–3000K for ambient zones, and make every circuit dimmable.
The types of coffee bar lighting options that work for most home setups fall into three tiers:
- Budget renter: Plug-in LED tape under cabinets (COB, 3000K, CRI ≥ 90) plus a clip-on or table lamp for ambient fill. No tools, no landlord conversation.
- Homeowner upgrade: Two mini pendants over the counter hung at a height typical for most residential setups plus hardwired under-cabinet strips and a dimmer switch on each circuit.
- High-end integrated: A linear pendant bar, recessed adjustable heads for accent, 12V hardwired LED channels under shelves, and a Matter-compatible smart dimmer for scene control.
Table of Contents
- What lighting roles does a coffee bar actually need?
- How do you choose and hang pendant lights over a coffee bar?
- When should you use recessed or track lighting instead?
- Under-cabinet and shelf lighting: which type actually works?
- Wall sconces, portable lamps, and statement fixtures
- What specs should you look for when buying bulbs and controls?
- Placement rules and exact measurements you can use right now
- How do finishes and materials shape the look of your coffee bar?
- What does research say about lighting, mood, and how drinks look?
- Common lighting mistakes and how to fix them fast
- Key Takeaways
- A pre-buy checklist before you shop or call an electrician
- Useful sources and further reading
What lighting roles does a coffee bar actually need?
Every well-lit coffee bar runs on three layers, and skipping any one of them is where most setups go wrong.
Ambient light is the base layer: it fills the room, sets the overall brightness, and determines whether the space reads as cozy or clinical. Task light is direct and focused, aimed at the prep surface where you’re pulling shots, steaming milk, or measuring grounds. Accent light is the layer that gives the space personality, drawing attention to open shelving, a statement espresso machine, or a curated mug collection.
Layering these zones creates depth and perceived quality that a single ceiling fixture simply cannot replicate. A flat ceiling grid washes everything evenly, which sounds fine until you realize it flattens shadows, kills texture, and makes the space feel more like a break room than a ritual corner.
Think of it as a three-dial system: ambient sets the room, task lights the work, accent frames the story. The real power comes when all three are on dimmable circuits, because you can shift the ratio depending on whether you’re pulling a 6 AM shot or hosting a slow Sunday morning.
Pro Tip: Set up two named scenes on your smart dimmer or plug-in smart plug: one “prep” scene (task at full, ambient at 60%) and one “lounge” scene (ambient at 40%, accent at 80%, task off). The difference in feel is immediate.
Warm, soft lighting in the 2700–3000K range encourages longer dwell time, while brighter neutral light at prep areas improves speed and accuracy. That single finding is the design brief for a home coffee bar in one sentence.
How do you choose and hang pendant lights over a coffee bar?
Pendants are the most visible fixture choice for a coffee bar, and they do double duty: ambient fill from above and a strong visual anchor for the whole setup.
Three pendant styles suit most home coffee bars well. Mini pendants (6–10 inches in diameter) work over narrow counters or galley-style bars where a larger shade would feel oppressive. Cluster pendants group three or more small globes on a single canopy, which reads as one statement piece while distributing light more softly. Linear pendant bars are a single elongated fixture that spans the counter length, ideal when the bar runs 36 inches or longer and you want a clean, modern line.
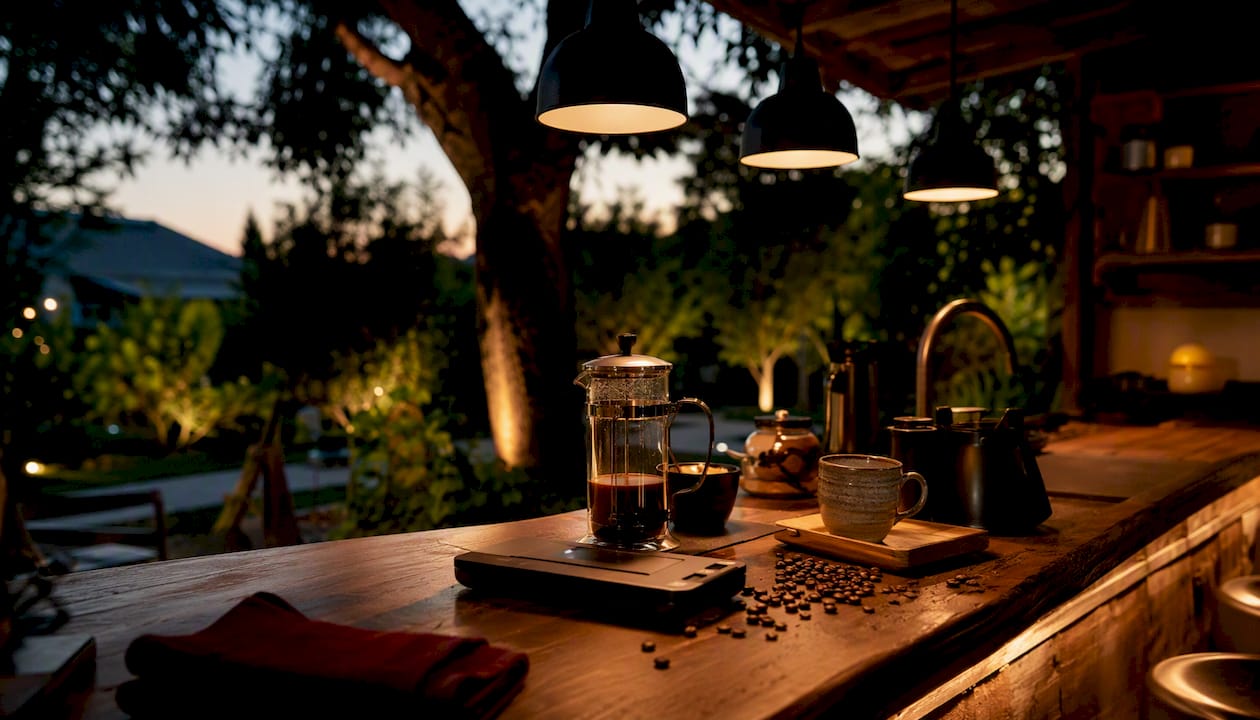
Sizing and spacing follow a straightforward rule: hang pendants 30–36 inches above the countertop and space them 24–36 inches center-to-center. For every additional foot of ceiling height beyond the standard 8 feet, increase the hanging height by roughly 3 inches to keep the fixture in visual proportion with the room.
Key decisions when buying pendants:
- One vs. a series: A single pendant works over a bar shorter than 24 inches. Anything longer benefits from two or three fixtures spaced evenly, which creates rhythm rather than a single spotlight.
- Shade material: Opaque metal shades direct light downward with precision but create a hard cutoff. Frosted glass or fabric diffusers spread light more softly and reduce glare at eye level.
- Bulb exposure: Open-cage or Edison-style pendants look great but put the bulb in direct sightline. Choose a filament-style LED rated at 2700K and keep wattage low to avoid glare.
Pro Tip: You can mix pendant finishes (say, aged brass canopy with a matte black shade) without the space looking disjointed, as long as every bulb in the run is the same color temperature. Mismatched Kelvin across pendants is far more visually jarring than mismatched metal.
When should you use recessed or track lighting instead?
Recessed and track systems are the right call when you want light that works hard without competing visually with the rest of the space.
Recessed downlights are clean and subtle. They disappear into the ceiling and let the coffee bar itself be the focal point, which is exactly what you want when the espresso machine or open shelving is the visual star. Track systems are more flexible: individual heads swivel and rotate, so you can aim one at the prep surface, one at a display shelf, and another at a piece of art, all from a single electrical connection.
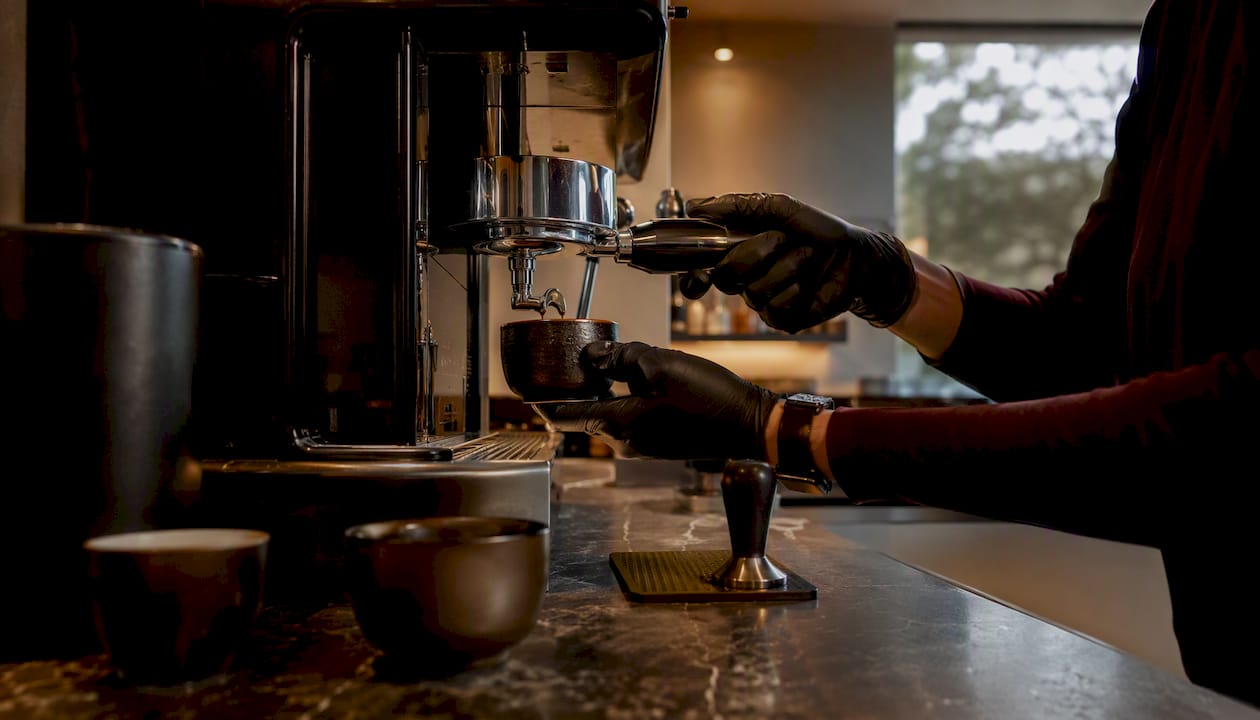
For aiming recessed or track heads at a counter, a 20°–35° narrow beam concentrates light precisely on the prep zone and creates a pleasing pool without spilling onto adjacent surfaces. A 40°–60° wide beam works better for general ambient fill or for washing a full shelf of mugs and canisters evenly.
Practical notes for homeowners retrofitting existing recessed cans:
- Replace incandescent trims with LED retrofit modules that specify CRI ≥ 90 and a dimmable driver.
- Choose a trim with an adjustable gimbal if the can is not positioned directly over the counter, so you can angle the beam to hit the work surface rather than the backsplash.
- Avoid recessed fixtures with exposed bulbs in a low-ceiling kitchen nook; the glare angle puts the bulb directly in sightline when you’re standing at the counter.
Track lighting is particularly useful for renters who can swap the track heads without touching the wiring, as long as the existing ceiling outlet is compatible with the track system’s voltage and connector type.
Under-cabinet and shelf lighting: which type actually works?
Under-cabinet lighting is the single highest-impact upgrade for a home coffee bar. It eliminates the shadow cast by upper cabinets, puts light exactly where you’re working, and adds a warm glow that makes the whole setup look intentional.
Three product types dominate this category, and they are not interchangeable:
- COB LED tape (chip-on-board): produces a seamless, dot-free line of light with no visible hotspots. COB strips are the preferred choice for under-cabinet task lighting because the continuous emitter surface reads as a clean wash rather than a string of individual dots. Mount them in an aluminum channel with a frosted diffuser cover for the cleanest result.
- SMD LED tape (surface-mounted device): more common and less expensive, but the individual LEDs are visible as dots at close range unless diffused. Fine for shelf backlighting where the tape is hidden behind a lip; less ideal for direct task light.
- Puck lights: small disc-shaped fixtures that mount with adhesive or magnets. They create distinct pools of light rather than a continuous wash, which works for accenting specific objects on a shelf but leaves dark gaps between pucks on a prep surface.
Installation by situation:
Pro Tip: For renters, plug-in COB tape with a smart plug gives you scene control and zero damage. Run the cord along the cabinet underside and tuck it behind a cable channel strip painted to match the cabinet color. It disappears.
- Renters: plug-in LED tape (COB preferred), magnetic rechargeable puck lights, or battery-powered LED bars. No tools, no holes.
- Homeowners: 12V hardwired strips with a hidden driver inside the cabinet, connected to a wall dimmer. Cleaner finish, more reliable dimming.
Spec targets for under-cabinet task light: 3000K color temperature, CRI ≥ 90, diffused housing, and a dimmable driver. A 3000K source reads as warm white without the amber cast of 2700K, which can make white surfaces look slightly yellow under direct light.
Wall sconces, portable lamps, and statement fixtures
Accent fixtures are where the coffee bar gets its character. They’re not doing the heavy lifting on task light, but they set the tone for everything else.
Wall sconces frame the bar visually and add a layer of warmth that overhead fixtures rarely achieve. Style pairings worth knowing:
- Farmhouse or rustic: cage-style sconces in aged brass or oil-rubbed bronze, paired with Edison-style filament LEDs at 2200K.
- Modern minimalist: slim cylinder sconces in matte black or brushed nickel with frosted glass diffusers.
- Vintage or eclectic: articulating arm sconces in antique brass, which also let you redirect light toward a specific shelf or object.
- Industrial: exposed conduit-style wall lights in raw iron or gunmetal, paired with globe bulbs.
For renters, plug-in swing-arm sconces are a practical solution. They mount with a single anchor, the cord runs along the wall to an outlet, and they come down without leaving more than a small hole. Paired with a smart plug, they become part of your scene control setup.
Portable table lamps on the counter or a nearby shelf add warmth at eye level, which is something ceiling fixtures structurally cannot do. Keep the bulb at 2700K or lower for evening mood, and choose a lamp with a fabric or linen shade to diffuse the light softly.
One rule that applies to every accent fixture: keep the color temperature consistent across all fixtures in the same zone. A 2700K sconce next to a 3500K pendant looks like a mistake, not a design choice.
What specs should you look for when buying bulbs and controls?
Getting the specs right is what separates a coffee bar that looks good in person from one that photographs well, functions cleanly, and holds up across different times of day.
Color temperature (Kelvin):
- Task surfaces (prep, espresso, pour-over): 3000–3500K. This range renders crema color, milk texture, and coffee tone accurately without the clinical edge of 4000K+.
- Ambient zones (seating, general fill): 2700–3000K. Warm enough to feel inviting, bright enough to read by.
- Warm-dim accents (evening mood, display): 1800–2200K. This is the range that makes a coffee bar feel like a destination rather than a kitchen corner.
CRI (Color Rendering Index): High-CRI bulbs show the true colors of crema, milk foam, and syrup. Aim for CRI ≥ 90 across every fixture. A CRI 80 source will make a golden crema look flat and a latte art pour look muddy, both in person and in photos.
Lumens and lux:
- Target 300–500 lux on prep surfaces for comfortable, accurate task work.
- Pendant fixtures typically deliver 800–1,500 lumens depending on shade size and mounting height.
Beam angles: 20°–35° for focused task or accent spots; 40°–60° for ambient wash or shelf coverage.
Controls: Every circuit benefits from a dimmable driver. For smart control, Matter/Thread-compatible dimmers offer reliable scene orchestration across platforms (Apple Home, Google Home, Amazon Alexa) without the pairing failures that plague older Zigbee or proprietary systems. Scene presets like “pull shot” (task full, ambient 50%) and “serve and social” (ambient 70%, accent 100%, task off) shift the entire bar’s feel in one tap.
Pro Tip: Warm-dim LED technology, where the color temperature drops from 3000K to 1800K as you dim, mimics the behavior of incandescent bulbs. It’s the single best upgrade for a coffee bar that needs to work at 6 AM and feel atmospheric at 8 PM.
Placement rules and exact measurements you can use right now
Good placement is what separates a lighting plan that looks designed from one that just looks lit.
The 5’7" eye-level rule: pendant shades and sconce centers should sit at or just above the average standing eye level of 5’7" (67 inches from the floor). For a counter-hung pendant, this means the bottom of the shade lands roughly at eye level when you’re standing at the bar, which prevents the fixture from blocking sightlines across the counter. If your household skews taller, adjust to 5’10" or 6’0" as your reference.
| Fixture | Measurement | Notes |
|---|---|---|
| Pendant height above counter | 30–36 inches | Add ~3" per extra foot of ceiling height |
| Pendant spacing (center-to-center) | 24–36 inches | Scale to counter length and fixture diameter |
| Sconce center height (above floor) | 60–66 inches | Aligns with eye-level sightline |
| Under-cabinet strip setback from front edge | 2–4 inches | Hides the strip from direct view |
| Track head aim distance from counter edge | 12–18 inches | Prevents glare at standing position |
Additional placement notes:
- For a two-pendant run over a 48-inch counter, center each pendant 12 inches from each end, leaving 24 inches between them.
- Sconces flanking a coffee bar should be mounted 28–36 inches apart (center-to-center) and at least 6 inches above the counter surface to avoid blocking workspace.
- When using recessed heads for accent, aim the beam at a 30° angle from vertical to hit a shelf or backsplash without creating a hot spot directly on the counter.
How do finishes and materials shape the look of your coffee bar?
Finish choice is the fastest way to signal a coffee bar’s aesthetic, and it’s also the easiest place to create visual noise if you’re not deliberate about it.
Three finish pairings consistently work across the most common home coffee bar styles:
Aged brass and walnut read as warm, considered, and slightly European. They pair naturally with Espritkaffe’s burnished amber aesthetic and suit mocha-toned or warm-wood setups. Use frosted amber glass shades to reinforce the warmth without going full vintage.
Matte black and raw iron suit industrial and modern-industrial setups. The finish absorbs light rather than reflecting it, which keeps the fixtures from competing with the coffee equipment. Pair with clear glass globes or open cage shades for contrast.
Brushed nickel and frosted glass are the cleanest choice for modern minimalist bars. They reflect light softly, work with both warm and neutral Kelvin sources, and don’t date as quickly as trend-driven finishes.
Scale matters as much as finish. A pendant with a 16-inch shade over a 24-inch counter will dominate the space; a 6-inch mini pendant will look lost over a 60-inch bar. The general rule: pendant diameter should be roughly one-third to one-half the counter width for a single fixture, or one-quarter the width per fixture in a series.
Pro Tip: Diffusers and frosted glass do more than soften glare. They also even out the light distribution across the counter, which means fewer bright spots and dark corners. If your current pendants create a hot circle of light directly below and leave the edges dim, a frosted diffuser is the fix.
Keeping color temperature and finish palette consistent across all fixtures in the same zone is the single most effective way to make a mixed-fixture setup look intentional rather than assembled.
What does research say about lighting, mood, and how drinks look?
The evidence here is practical and direct: lighting changes how long people stay, how fast they work, and how good the coffee looks.
Warm lighting in the 2700–3000K range is consistently linked to longer dwell time and a more relaxed, comfortable atmosphere. Brighter, neutral light at prep surfaces improves accuracy and speed. These two findings point to the same design conclusion: zone your lighting by function, not by fixture type.
CRI is where most home setups leave quality on the table. A CRI 80 bulb renders roughly 80% of the visible color spectrum accurately. At CRI 90+, the difference in a poured crema or a latte art pattern is visible to the naked eye, and it’s dramatic in photos. If you’re building a coffee bar partly for the ritual of it, and partly because it looks good on a shelf or in a photo, CRI ≥ 90 is not optional.
Color temperature consistency across zones also affects perceived quality. A 2700K ambient source next to a 4000K task light creates a visual tension that reads as “something is off” even when viewers can’t name it. Keeping all fixtures within a 300K range of each other (or using warm-dim sources that shift together) eliminates that tension.
Pro Tip: Before buying any bulb, check the spec sheet for both CRI and R9 value. R9 measures red color rendering specifically, and a high R9 (above 50) is what makes warm tones in wood, copper, and crema look rich rather than washed out. Most budget LED bulbs have R9 values near zero.
Scene orchestration is the practical tool that ties all of this together. A “morning prep” scene and an “evening lounge” scene use the same fixtures at different ratios and Kelvin settings, shifting the bar’s entire feel without touching a single fixture.
Common lighting mistakes and how to fix them fast
Most coffee bar lighting problems come down to four errors, and three of them are fixable without touching the wiring.
Single flat ceiling grid: One overhead fixture, no layers, no zones. The fix is additive: plug in under-cabinet LED tape and a table lamp or sconce. You don’t need to remove anything; you need to add depth.
Mismatched color temperatures: A 2700K pendant next to a 4000K recessed can looks like two different rooms colliding. Swap the outlier bulb to match the dominant Kelvin in the zone. Avoiding this mismatch is one of the most cited improvements in lighting design for coffee spaces.
Neglecting CRI: Buying on wattage and color temperature alone, then wondering why the coffee looks flat. Replace with CRI ≥ 90 bulbs. The price difference between CRI 80 and CRI 90 LED bulbs is typically a few dollars per fixture.
Too-bright task light creating glare: A pendant hung too low or a recessed head aimed directly at a reflective surface (stainless espresso machine, glossy tile) creates uncomfortable glare. Raise the pendant to the 30–36 inch height range, or swap the recessed trim for a baffle trim that cuts the glare angle.
Pro Tip: Renters: a $15 smart plug on your under-cabinet strip and a $12 plug-in dimmer on your table lamp gives you two-zone scene control with zero permanent changes. That’s the whole system.
Homeowners with a slightly larger budget can add a Lutron Caséta or Leviton Decora smart dimmer to existing wall switches, which brings full scene control to hardwired fixtures without rewiring.
Key Takeaways
Layer task, ambient, and accent lighting with CRI ≥ 90 dimmable sources at 3000–3500K for prep and 2700–3000K for ambient to get a coffee bar that looks and functions well at any time of day.
| Point | Details |
|---|---|
| Layer all three lighting types | Combine ambient, task, and accent fixtures; no single fixture type covers all three roles. |
| CRI ≥ 90 is non-negotiable | Lower CRI flattens crema color and makes latte art look muddy in person and in photos. |
| Kelvin by zone | Use 3000–3500K for task surfaces and 2700–3000K for ambient; keep all fixtures within 300K of each other. |
| Pendant height and spacing | Hang pendants 30–36 inches above the counter and space them 24–36 inches apart, adding about 3 inches in hanging height for every extra foot of ceiling height to maintain proportion. |
| Make every circuit dimmable | Dimmable drivers and smart scenes let one fixture set serve both morning prep and evening atmosphere. |
A pre-buy checklist before you shop or call an electrician
Most lighting plans go wrong before a single fixture is purchased, because the measurements weren’t taken and the constraints weren’t defined. Here’s the checklist worth running through first.
Before you buy anything:
- Measure your counter length and ceiling height. These two numbers determine pendant size, hanging height, and whether a linear bar or individual pendants make more sense.
- Decide renter vs. permanent. Renters should default to plug-in tape, magnetic pucks, and smart plugs. Homeowners can invest in hardwired strips and smart dimmers.
- Pick your task Kelvin first (3000K is the right call for most setups), then match ambient fixtures to within 300K of that target.
- Choose your control method: a standard dimmer, a smart dimmer (Lutron Caséta, Leviton Decora), or a Matter-compatible smart plug for plug-in fixtures.
- Pick two finishes maximum and hold to them. Aged brass and matte black is a pairing; aged brass, matte black, brushed nickel, and chrome is a collection of unrelated objects.
The Espritkaffe aesthetic, warm amber tones, clean typography, and a sense of deliberate ritual map directly onto aged brass or brushed nickel fixtures with frosted diffusers and 2700–3000K sources. If your coffee bar is built around that same sensibility, those finish and Kelvin choices are the starting point, not the finishing touch.
For remote workers building a dedicated coffee corner that doubles as a workspace, the lighting plan also needs to account for screen glare and video call backgrounds. A warm-dim scene for calls (ambient at 70%, task off) and a task scene for prep (task full, ambient 50%) covers both use cases without a second thought.
And once the lighting is right, the coffee should match. Espritkaffe’s instant coffee is the fastest way to test how your new setup renders a real cup, no espresso machine required.
Useful sources and further reading
These are the sources behind the specs and recommendations in this article, worth bookmarking if you’re going deeper on any one topic.
| Source | What it covers |
|---|---|
| Luminous Living / thelights.shop | Full lighting plan for home espresso bars: Kelvin targets, CRI guidance, scene presets, and smart control recommendations. |
| Summer Stirs / summerstirs.com | Pendant spacing and hanging height rules, lumen targets, and mocha-aesthetic fixture ideas. |
| PacLights lighting engineer’s guide | Technical layering guidance, zone-based design, and common mistakes from a commercial lighting engineering perspective. |
| CoffeeExplore under-cabinet tips | COB vs. SMD LED strip comparison, installation options, and warm-white spec recommendations for home setups. |
| WTLighting blog | Color temperature and finish palette consistency for café-style spaces; useful for style and materials decisions. |